Animation Browser
The main window: every animation clip in the project, searchable, previewable and sortable. Ctrl+Shift+A.
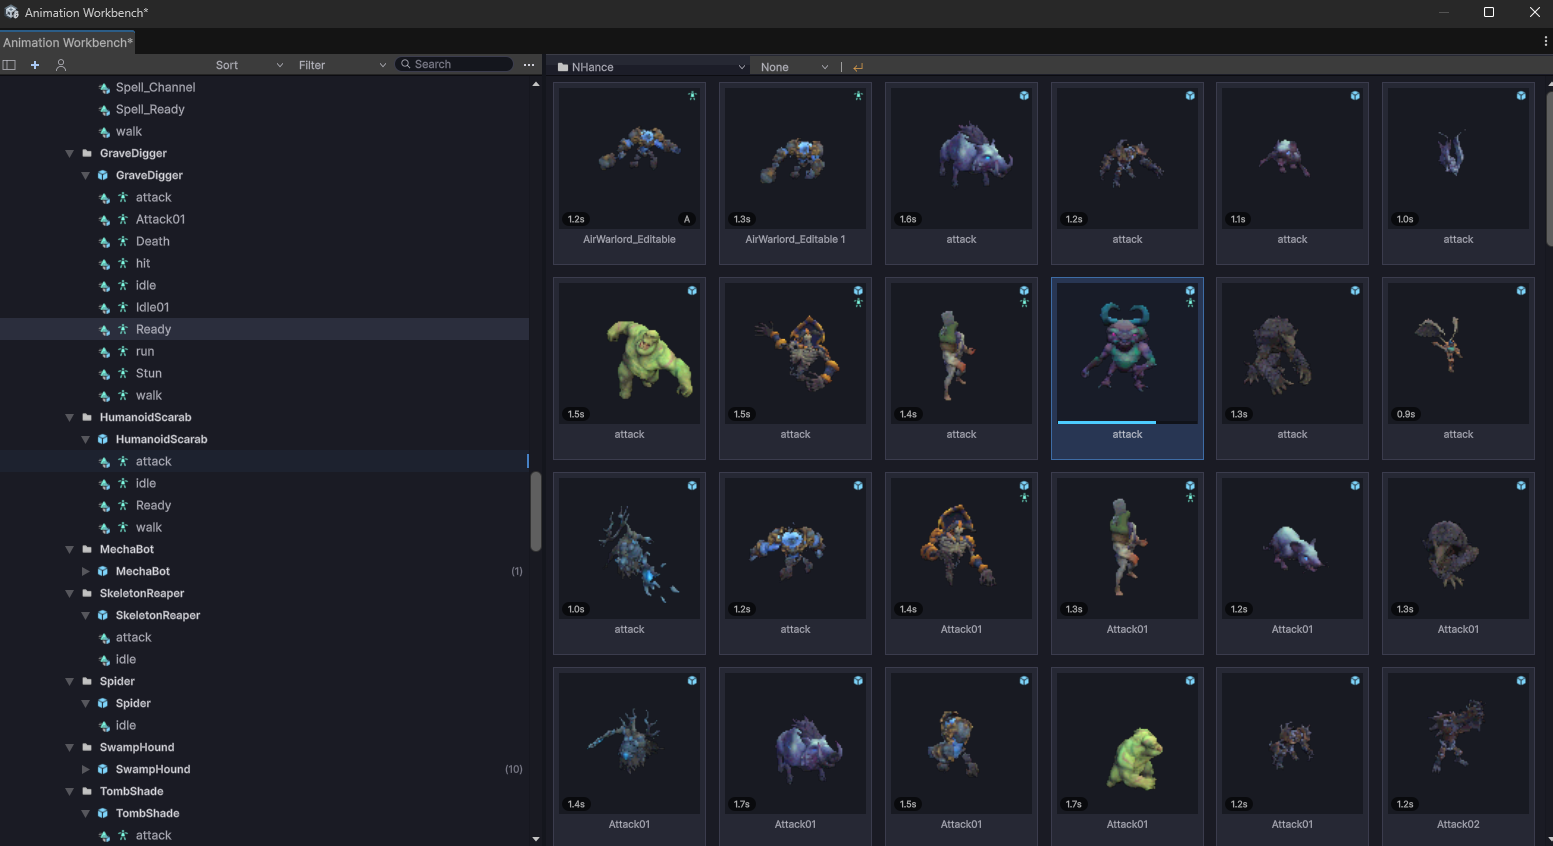
Finding a clip
Search
The search box takes several terms at once, separated by spaces, and scores matches rather than doing a plain substring test - so run fw finds Run_Forward_Fast without you spelling it out.
Filters
Filters stack, and they combine with AND:
| Filter | Comes from |
|---|---|
| Type filters | Clip properties - humanoid, looping and the rest |
| Ruleset filters | Your rulesets, one toggle per rule |
| Quick Filter | An ad-hoc rule you build on the spot and throw away again |
| Folder / tag | The tree on the left, and palette tags |
Ruleset filters can be inverted - click again for NOT, which turns "everything tagged Combat" into "everything that isn't". That is how you find the clips a rule missed.
:::tip Quick Filter is for the question you only have once "Which of these 400 clips run longer than three seconds and still have no events?" Build it, read the count, drop it again - without spending one of your saved rules on it. Quick Filter is a Pro feature; see Lite & Pro. :::
Sorting
Name, duration, frame count, last updated, version count, events, audio events, spawn events, usage in project, usage in scenes, and preview character - ascending or descending.
Sorting by usage is the fastest way to find the clips nobody references any more. Sorting by events finds the ones that were never wired up.
Viewing a clip
- Grid or list, with a size slider
- Inspector panel beside the list for the selected clip - metadata, events, versions
- Single-clip view on double-click, with an orbit preview you can spin and frame
- Rename in place, without leaving for the Project window
- Navigation history - back and forward, like a browser
Drag a clip out of the window and drop it into the scene or onto a character to try it there.
The Work Area
A tray along the bottom of the project list holding what you are working on right now. The bar is always there; it unfolds once something is in it.
The point is that a working set is rarely a folder. The clips you are touching this afternoon are three from one character, one from another and a whole model you are about to retime - and no filter describes that. Put them here and they stay together while you keep browsing, searching and filtering above.
| Putting something in | Drag it onto the tray, or use Add to Work Area in the right-click menu. Clips, whole folders and model files are all accepted |
| A folder or a model | Goes in as ONE row with the number of clips beside it - not as its contents. Click the row to select all of them, Ctrl-click to add them to what is already selected |
| A clip row | Click to select - the inspector beside the list follows. Drag it out into the scene or the Keyframe Editor exactly like a row in the list above, and use Open (Standalone) on the right-click menu to open it |
| Taking something out | The cross on the row, or Clear Work Area in the header |
| Capacity | 32 entries - and a folder counts as one of them, however many clips it holds |
A folder row counts the clips that sit directly in it, which is the same number its header shows in the list. Subfolders are their own entries.
The tray survives domain reloads and restarts. It is a scratch list, not a saved selection: it stores paths, so a renamed folder drops out of it rather than following along under a name you did not put there.
Multi-clip compare
Select several clips and compare them:
- Side by side - one character per clip, playing in sync
- Ghost mode - every clip as a tinted ghost on one stage, spaced as far apart as you like. Push them together and you see exactly where two takes diverge
This is the tool for "is attack_02 actually different from attack_03, or did someone duplicate it?".
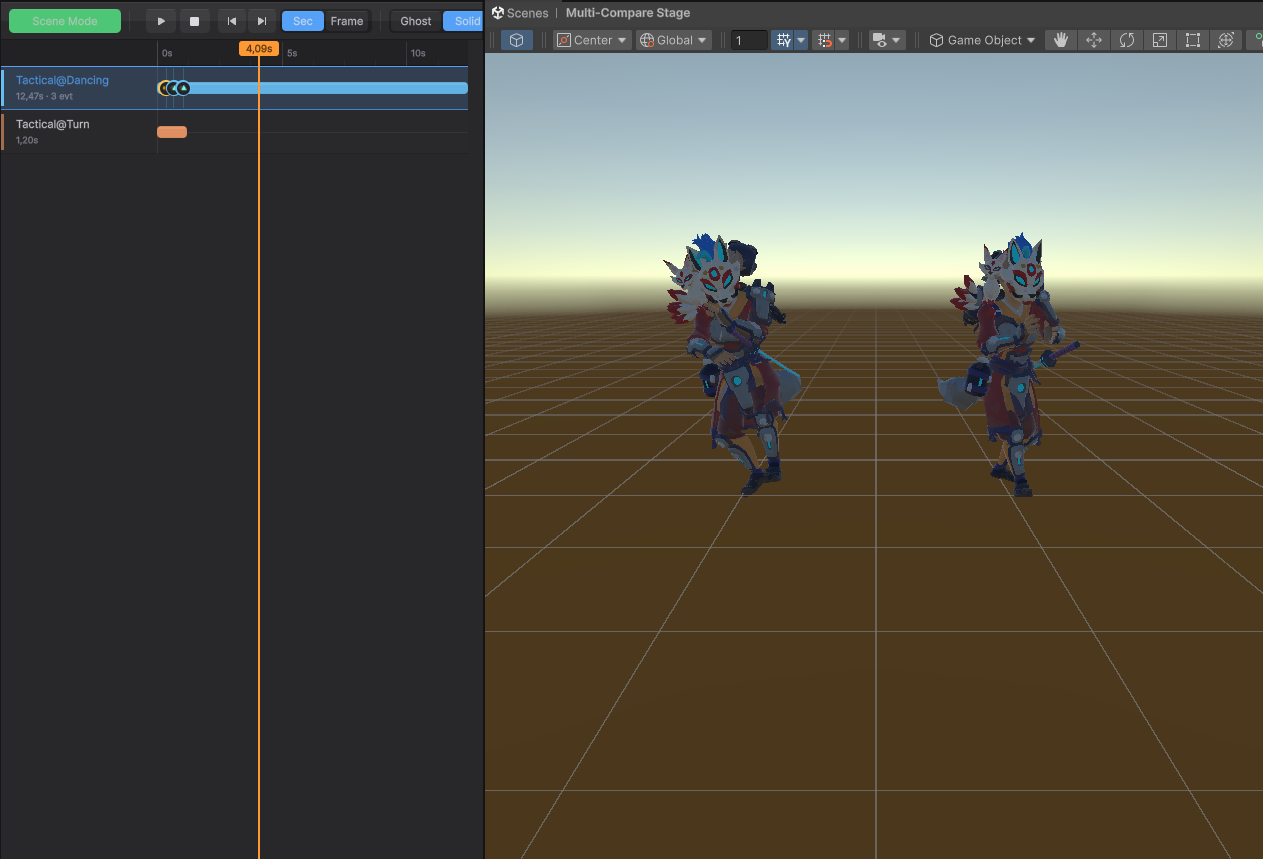
Each clip gets its own row on the left with its length and event count; the playhead drives all of them at once.
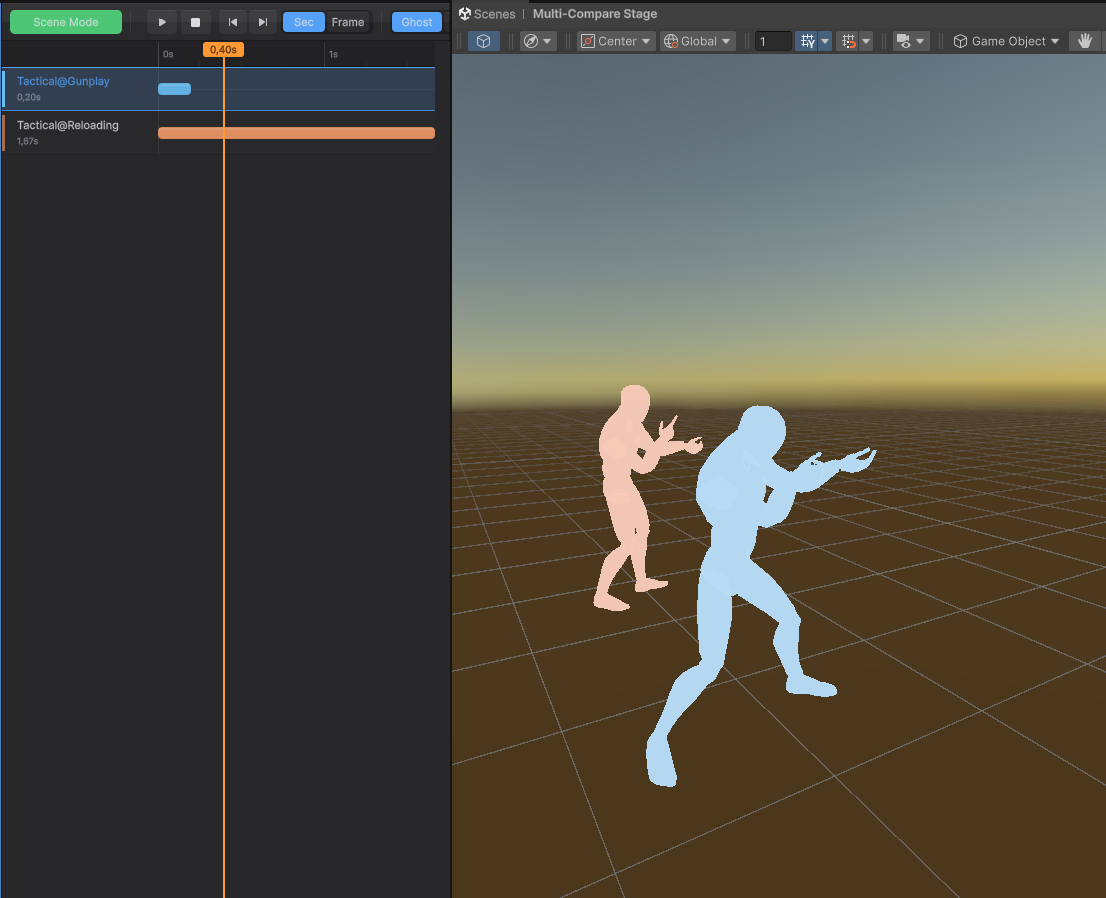
The Ghost toggle in the toolbar switches the stage over: instead of one character per clip, every clip becomes a coloured, semi-transparent ghost. A spacing control decides how far apart they stand - turn it down to zero and they occupy the same space, which is how you see the exact frame where two takes of the same action start to differ.
Thumbnails
Thumbnails are short animated previews, rendered by the tool and cached at three levels:
| Cache | Lives | Purpose |
|---|---|---|
| RAM | Session | Instant redraw for recently shown clips |
| GPU | Session | Render textures for what is on screen |
| Disk | Persistent | Library/AWAnimationPreviewCache/ |
Rendering is serialized, one clip at a time, and driven by a time budget that adapts to how fast you are scrolling. That is a deliberate design: previews share one scene and Unity's global animation mode, so the work cannot be parallelized - but it can be paced so the editor stays responsive.
Consequences worth knowing:
- The first pass over a large library takes a while. It runs in the background and you can keep working. The second visit is instant.
- Quality is a preset, not a resolution slider - see Settings.
- No preview? Almost always a missing or unsuitable preview character. Character Setup has the checklist.
Keeping up to date
The library re-scans:
- On first open, asynchronously
- When animations are imported, via a change watcher
- On a manual refresh
You should not have to press refresh in normal use. If you do, that is worth a bug report.
From the browser into an editor
- Double-click - single-clip view with the orbit preview
- Context menu → New Keyframe Editor - opens the clip in its own editor window
- Drag into the scene - drop a clip onto a character to try it in place
From the Keyframe Editor you can then pose the clip on a stage character or, with Scene Edit, on a character that is already in your scene. Both are available in every edition - see Pose Editing.